
Set up paid on-demand webinars
Your on-demand webinar is valuable to your viewer. So valuable even, you might want to add a price tag. Just as with a live or automated webinar, you can create a paid on-demand webinar.
A paid on-demand webinar is the perfect tool to generate a passive income. You don't have to rent a location, book in time, and follow all the steps as you would with a live webinar. Instead, you record your on-demand webinar once and offer it to your viewers at a certain price. After that, you don't have to think about it anymore. Well almost, just don't forget to answer the questions from your on-demand viewers.
For example, when you use your on-demand webinar as a course and place the registration form on your own website, new participants will keep subscribing, and you keep generating income from that one paid on-demand webinar.
To create a paid on-demand webinar you need an on-demand webinar and an account at Mollie. If you don't have a Mollie account or you don't want to create an account we've got another option for you later in this course. Just keep reading!
Link Mollie to your WebinarGeek account
We start with Mollie first. When you want to set up your payments you get the message to link your account to Mollie. If you already have an approved Mollie account you can continue with linking right away. Don't have an account yet? Create an account at mollie.com. After your account has been approved you can continue with the next step.
Within WebinarGeek, go to "Registration" and then to "Payments" to activate your paid webinars.
If you want to link Mollie at the account level, go to “My Account” and "Activate account" under "Paid webinars".
Click “Connect via Mollie” and log in with your Mollie account. You've linked Mollie with WebinarGeek!
Within Mollie, you must enable a payment method on your payment profile. Go to your account and then to 'Settings' > 'payment methods'. You can activate different payment options here, like iDeal, Bancontact, and credit card.
Create a website profile for paid webinars. Go to "Settings" and add a link from the registration page of your published webinar to “Website”.
Enter the rest of the information by describing the content of your webinar.
Add your contact details. Please note! Your contact details must also be on the registration page.
Voila! After your website profile has been created and approved by Mollie, you can receive payments for your webinars.
Payments from your paid on-demand webinars:
Your website profile must be approved. As long as this is not the case, your payments will be held by Mollie. When approved, you will get the money deposited in your bank account!
Is your website profile rejected by Mollie? Visit the Mollie Help Center to read about what to do next.
Paid on-demand webinars without Mollie
You may not want to use Mollie because you already use a different payment system. It's still possible to create paid on-demand webinars without a Mollie account. This can be done with Zapier.
Zapier is a web-based service that makes it possible to link various applications and works with more than 2000 other applications. This also means other payment systems such as Paypal or Stripe. The first step is to research if your payments system van be linked to WebinarGeek. These are the steps:
Create a Zapier account. You'll need a paid Zapier account.
Search for your current payment system and see if a link is available, through “Search for apps to connect” and view the results.
When you've found your app, you get to see the possibilities of the integration, such as the available triggers and actions.
As mentioned above, Zapier supports over 2000 applications. It can be interesting to research what other apps can be integrated with WebinarGeek to upgrade your workflow and to make hosting your webinars even easier.
Next courses

E-Mail-Template-Trends von Unlayer
Generiere Anmeldungen mit dem E-Mail- und Seiten-Editor, unterstützt durch KI.

Wie man Webinare mit Streamlabs Desktop streamt
Lerne, wie du Webinare professionell mit Streamlabs Desktop einrichtest und streamst! In dieser ersten Folge führen wir dich durch die grundlegenden Schritte, um die Kunst des Webinar-Streamings zu meistern.

Erstelle dein erstes Webinar: Ein Leitfaden für Einsteiger
Bereit für dein erstes Webinar? Schau dir unsere Videoserie „Ein Leitfaden für Einsteiger“ an – wir zeigen dir alles: von der Zielsetzung bis zur Themenwahl. Erfahre, wie du mit den Tools von WebinarGeek den Ablauf optimierst.

5 Kamera-Tipps für dein Webinar
Entdecke 5 Kamera-Tipps zur Verbesserung deiner Webinar-Videoqualität. Mit besserem Licht, Winkel und Bildausschnitt wirkst du professioneller und überzeugender.

Optimiere deine Webcam mit OBS Teil 2
Verbessere die Bildqualität deiner Webcam mit OBS! Lerne, wie du Einstellungen wie Weißabgleich, Gamma und mehr anpasst, um ein professionelles Erscheinungsbild zu erzielen.

Create a webinar for communications
Engage, challenge, and measure your viewers with these features
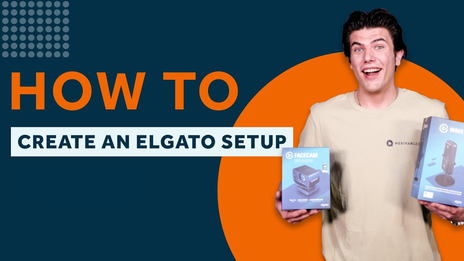
Dein Ultimatives Elgato-Setup – Komplette 3-teilige Videoserie
Lerne in dieser 3-teiligen Serie, wie du das ultimative Elgato-Setup erstellst—vom Unboxing über die Software bis zur vollständigen Live-Einrichtung für besseres Streaming.

Erstelle einen Content-Kalender mit Intercom
Intercoms Transformation von keinem Content-Kalender zu einer vollständigen Strategie und einem durchdachten Content-Kalender.
Erstelle ein On-Demand-Webinar
Erlebe die Vorteile von On-Demand-Webinaren mit dieser Schritt-für-Schritt-Checkliste. 🚀

Einen erfolgreichen Webinar-Kanal für wiederkehrende Inhalte aufbauen
Richte deinen Kanal ein, verwalte wiederkehrende Webinare und promote deine Inhalte, um dein Publikum zu vergrößern.